前言
经过前两篇介绍了VuePress2之后,其实已经有了一个简单的理解。
在我后续深入研究了一下,觉得还是有必要再开一篇文章介绍一下它的具体使用步骤。
毕竟它的官方文档其实是写的非常简单的,对于初学者来说,需要一定的基础知识。
配置
在 /docs/.vuepress 目录,创建 config.ts 的配置文件。
这个配置文件,你网站的所有配置基本上都在这个文件中进行修改
初始的内容为:
1
2
3
4
5
6
7
| import { defaultTheme } from '@vuepress/theme-default'
export default {
theme: defaultTheme({
}),
}
|
主页
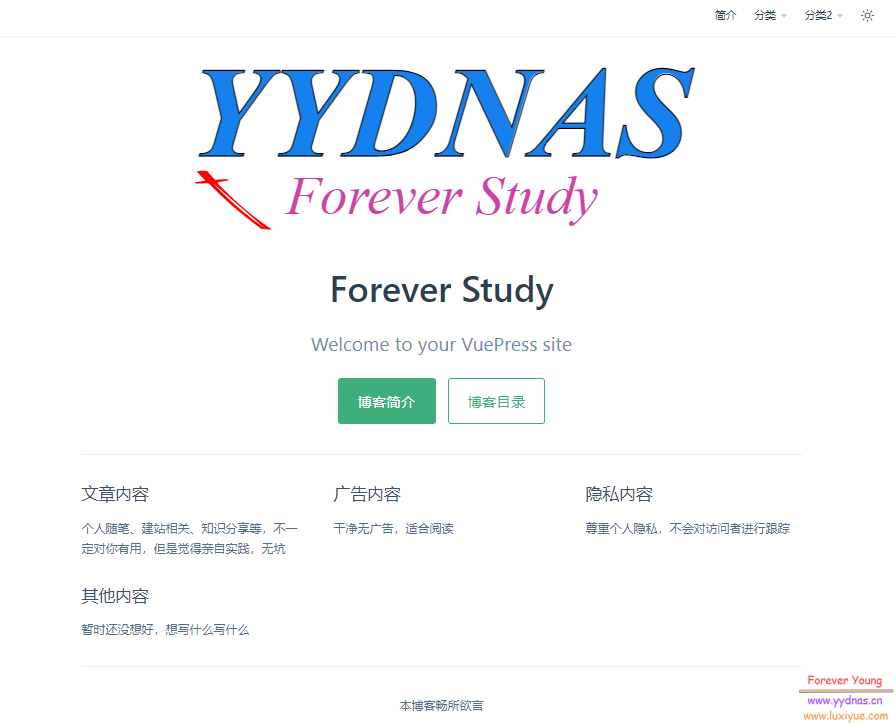
主页配置为 home 属性,它的主页文件为:/docs/README.md
只要一个简单的模版即可达到效果。
1
2
3
4
5
6
7
8
9
10
11
12
13
14
15
16
17
18
19
20
21
22
| ---
home: true
heroImage: /image/logo.svg
heroText: Forever Study
actions:
- text: 博客简介
link: /intro/
type: primary
- text: 博客目录
link: /blog/
type: secondary
features:
- title: 文章内容
details: 个人随笔、建站相关、知识分享等,不一定对你有用,但是觉得亲自实践,无坑
- title: 广告内容
details: 干净无广告,适合阅读
- title: 隐私内容
details: 尊重个人隐私,不会对访问者进行跟踪
- title: 其他内容
details: 暂时还没想好,想写什么写什么
footer: 本博客畅所欲言
---
|
home: true :显示为网站页面,不会以文章形式显示
heroImage: /image/logo.svg : 网站logo,存放路径为 ../public/image/ 文件夹内
heroText: Forever Study : 网站标题
actions: :主页上的按钮
features: : 特性,内容看着填
footer: : 底部放备案号的地方
效果:

导航
设置为 false 可以禁用导航栏。
为了配置导航栏元素,你可以将其设置为 导航栏数组 ,其中的每个元素是 NavbarItem 对象、 NavbarGroup 对象、或者字符串:
NavbarItem 对象应该有一个 text 字段和一个 link 字段,还有一个可选的 activeMatch 字段。
NavbarGroup 对象应该有一个 text 字段和一个 children 字段。 children 字段同样是一个 导航栏数组 。
字符串应为目标页面文件的路径。它将会被转换为 NavbarItem 对象,将页面标题作为 text ,将页面路由路径作为 link 。
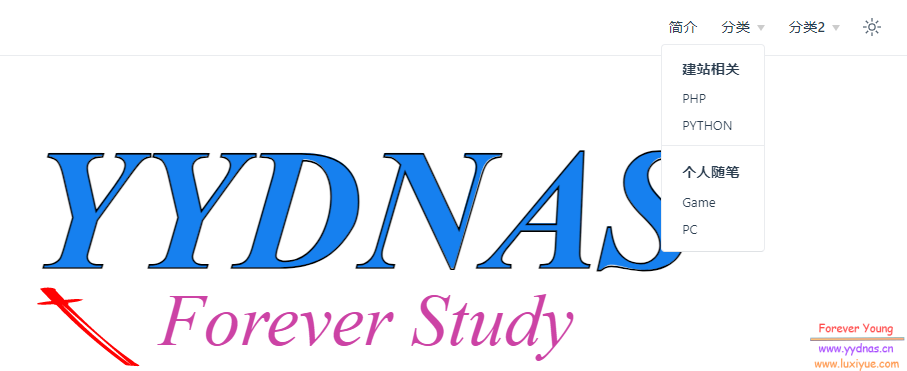
导航栏的配置嵌套深度为2,这边就以这个配置为例:
1
2
3
4
5
6
7
8
9
10
11
12
13
14
15
16
17
18
19
20
21
22
23
24
25
26
27
28
29
30
31
32
33
34
35
36
37
38
| import { defaultTheme } from '@vuepress/theme-default'
export default {
theme: defaultTheme({
navbar: [
{text: '简介',link: '/intro/',},
{
text: '分类',
children: [
{
text: '建站相关',
children: ['/server/php/', '/server/python/'],
},
{
text: '个人随笔',
children: ['/personal/game/', '/personal/pc/'],
},
],
},
{
text: '分类2',
children: [
{
text: '建站相关2',
link: '/server2/',
activeMatch: '/',
},
{
text: '个人随笔2',
link: '/personal2/',
activeMatch: '^/foo/',
},
],
},
],
}),
}
|
看一下效果:

上面 link 的路径在 docs 文件夹内,需要多了解一下VuePress的路由
Logo
Logo的设置也在 config.ts 内,添加:
1
2
3
4
5
6
7
8
| export default {
theme: defaultTheme({
logo: '/images/hero.png',
logo: 'https://vuejs.org/images/logo.png',
}),
}
|
注意前面的两行,已经在文件中存在了,所以只需将 logo 那一行粘贴在相应的位置就行。

搜索
搜索插件有两个:docsearch 和 search
docsearch
1.安装插件
1
| npm i -D @vuepress/plugin-docsearch@next
|
2.配置
1
2
3
4
5
6
7
8
9
| import { docsearchPlugin } from '@vuepress/plugin-docsearch'
export default {
plugins: [
docsearchPlugin({
}),
],
}
|
由于这个插件需要提交网站 URL 来加入 DocSearch 项目。当你的索引成功创建后, DocSearch 团队会将 apiKey 和 indexName 发送到你的邮箱。接下来,你就可以配置该插件,在 VuePress 中启用 DocSearch 了。
我这边就不介绍了。
search
1.安装插件
1
| npm i -D @vuepress/plugin-search@next
|
2.配置
1
2
3
4
5
6
7
8
9
| import { searchPlugin } from '@vuepress/plugin-search'
export default {
plugins: [
searchPlugin({
}),
],
}
|
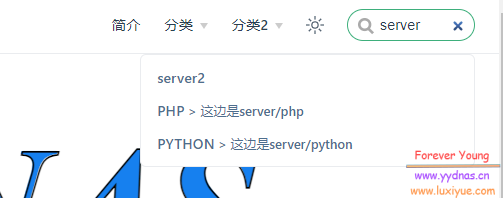
配置项可以为空,直接引入搜索插件即可,这个时候你的页面应该就有搜索框了。

到这里,你的 config.ts 文件内容应该是:
1
2
3
4
5
6
7
8
9
10
11
12
13
14
15
16
17
18
19
20
21
22
23
24
25
26
27
28
29
30
31
32
33
34
35
36
37
38
39
40
41
42
43
44
45
| import { defaultTheme } from '@vuepress/theme-default'
import { searchPlugin } from '@vuepress/plugin-search'
export default {
theme: defaultTheme({
logo: '/image/logo.svg',
navbar: [
{text: '简介',link: '/intro/',},
{
text: '分类',
children: [
{
text: '建站相关',
children: ['/server/php/', '/server/python/'],
},
{
text: '个人随笔',
children: ['/personal/game/', '/personal/pc/'],
},
],
},
{
text: '分类2',
children: [
{
text: '建站相关2',
link: '/server2/',
activeMatch: '/',
},
{
text: '个人随笔2',
link: '/personal2/',
activeMatch: '^/foo/',
},
],
},
],
}),
plugins: [
searchPlugin({
}),
],
}
|
样式
更改网站的布局样式,需要创建一个文件: .vuepress/styles/index.scss
然后将下面内容添加在其中并修改:
1
2
3
4
5
6
7
8
9
10
11
12
13
14
15
16
17
18
19
20
21
22
23
24
25
26
27
28
29
30
31
32
33
34
35
36
37
38
39
40
41
42
43
44
45
46
47
48
49
50
51
52
53
54
55
56
57
58
59
60
61
62
63
64
65
66
67
68
69
70
71
72
73
74
75
76
77
78
79
80
81
82
83
84
85
86
87
88
89
90
91
92
93
94
95
96
97
98
99
100
101
102
103
104
105
106
107
108
109
110
111
112
113
114
115
116
117
118
119
120
121
122
123
124
125
126
127
128
129
130
131
132
133
134
135
136
137
138
139
140
141
142
143
144
145
146
147
148
149
| :root {
--c-brand: #3eaf7c;
--c-brand-light: #4abf8a;
--c-bg: #ffffff;
--c-bg-light: #f3f4f5;
--c-bg-lighter: #eeeeee;
--c-bg-dark: #ebebec;
--c-bg-darker: #e6e6e6;
--c-bg-navbar: var(--c-bg);
--c-bg-sidebar: var(--c-bg);
--c-bg-arrow: #cccccc;
--c-text: #2c3e50;
--c-text-accent: var(--c-brand);
--c-text-light: #3a5169;
--c-text-lighter: #4e6e8e;
--c-text-lightest: #6a8bad;
--c-text-quote: #999999;
--c-border: #eaecef;
--c-border-dark: #dfe2e5;
--c-tip: #42b983;
--c-tip-bg: var(--c-bg-light);
--c-tip-title: var(--c-text);
--c-tip-text: var(--c-text);
--c-tip-text-accent: var(--c-text-accent);
--c-warning: #ffc310;
--c-warning-bg: #fffae3;
--c-warning-bg-light: #fff3ba;
--c-warning-bg-lighter: #fff0b0;
--c-warning-border-dark: #f7dc91;
--c-warning-details-bg: #fff5ca;
--c-warning-title: #f1b300;
--c-warning-text: #746000;
--c-warning-text-accent: #edb100;
--c-warning-text-light: #c1971c;
--c-warning-text-quote: #ccab49;
--c-danger: #f11e37;
--c-danger-bg: #ffe0e0;
--c-danger-bg-light: #ffcfde;
--c-danger-bg-lighter: #ffc9c9;
--c-danger-border-dark: #f1abab;
--c-danger-details-bg: #ffd4d4;
--c-danger-title: #ed1e2c;
--c-danger-text: #660000;
--c-danger-text-accent: #bd1a1a;
--c-danger-text-light: #b5474d;
--c-danger-text-quote: #c15b5b;
--c-details-bg: #eeeeee;
--c-badge-tip: var(--c-tip);
--c-badge-warning: #ecc808;
--c-badge-warning-text: var(--c-bg);
--c-badge-danger: #dc2626;
--c-badge-danger-text: var(--c-bg);
--t-color: 0.3s ease;
--t-transform: 0.3s ease;
--code-bg-color: #282c34;
--code-hl-bg-color: rgba(0, 0, 0, 0.66);
--code-ln-color: #9e9e9e;
--code-ln-wrapper-width: 3.5rem;
--font-family: -apple-system, BlinkMacSystemFont, 'Segoe UI', Roboto, Oxygen,
Ubuntu, Cantarell, 'Fira Sans', 'Droid Sans', 'Helvetica Neue', sans-serif;
--font-family-code: Consolas, Monaco, 'Andale Mono', 'Ubuntu Mono', monospace;
--navbar-height: 3.6rem;
--navbar-padding-v: 0.7rem;
--navbar-padding-h: 1.5rem;
--sidebar-width: 20rem;
--sidebar-width-mobile: calc(var(--sidebar-width) * 0.82);
--content-width: 740px;
--homepage-width: 960px;
}
.back-to-top {
--back-to-top-color: var(--c-brand);
--back-to-top-color-hover: var(--c-brand-light);
}
.DocSearch {
--docsearch-primary-color: var(--c-brand);
--docsearch-text-color: var(--c-text);
--docsearch-highlight-color: var(--c-brand);
--docsearch-muted-color: var(--c-text-quote);
--docsearch-container-background: rgba(9, 10, 17, 0.8);
--docsearch-modal-background: var(--c-bg-light);
--docsearch-searchbox-background: var(--c-bg-lighter);
--docsearch-searchbox-focus-background: var(--c-bg);
--docsearch-searchbox-shadow: inset 0 0 0 2px var(--c-brand);
--docsearch-hit-color: var(--c-text-light);
--docsearch-hit-active-color: var(--c-bg);
--docsearch-hit-background: var(--c-bg);
--docsearch-hit-shadow: 0 1px 3px 0 var(--c-border-dark);
--docsearch-footer-background: var(--c-bg);
}
.external-link-icon {
--external-link-icon-color: var(--c-text-quote);
}
.medium-zoom-overlay {
--medium-zoom-bg-color: var(--c-bg);
}
#nprogress {
--nprogress-color: var(--c-brand);
}
.pwa-popup {
--pwa-popup-text-color: var(--c-text);
--pwa-popup-bg-color: var(--c-bg);
--pwa-popup-border-color: var(--c-brand);
--pwa-popup-shadow: 0 4px 16px var(--c-brand);
--pwa-popup-btn-text-color: var(--c-bg);
--pwa-popup-btn-bg-color: var(--c-brand);
--pwa-popup-btn-hover-bg-color: var(--c-brand-light);
}
.search-box {
--search-bg-color: var(--c-bg);
--search-accent-color: var(--c-brand);
--search-text-color: var(--c-text);
--search-border-color: var(--c-border);
--search-item-text-color: var(--c-text-lighter);
--search-item-focus-bg-color: var(--c-bg-light);
}
|
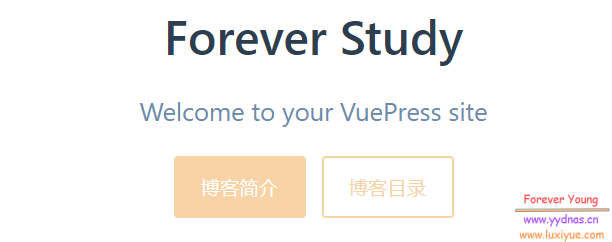
第一项的 brand colors 一看就是首页的 actions 按钮颜色,稍微改一下。

结尾
到这边其实大部分常用的功能都已经配置好了,后期根据自己的需求进行优化以及添加内容,不得不说VuePress对比Hexo、Hugo等,它的配置相对来说会稍显复杂一些,但是它的优点也在于比较开放,各插件模块的自定义程度非常高,基本上掌握一点基础的知识,那么理论上你可以尽情地折腾。


