简介

InvoiceNinja 是一个开源的自托管和云托管的开发票平台。

秉承其座右铭,InvoiceNinja的界面简单直观,使创建发票变得轻而易举。 诸如管理客户,开具新发票或添加付款之类的任务只是简单的操作,即使没有经验的用户也可以轻松进行。 其简单的仪表板可以向用户显示有关所创建发票及其状态的相关信息。 发票的实时预览将帮助您在将其发送给客户之前轻松地对其进行检查。

Github地址

官方安装指导

步骤

1. 安装

  1. PHP

    1
    apt install php8.2-apcu php8.2-bcmath php8.2-bz2 php8.2-curl php8.2-dev php8.2-enchant php8.2-intl php8.2-redis php8.2-memcached php8.2-xsl php8.2-zip php8.2-gd php8.2-imagick php8.2-igbinary php8.2-mysql php8.2-pspell php8.2-smbclient php8.2-imap php8.2-mbstring php8.2-tidy php8.2-ldap php8.2-msgpack php8.2-xml php8.2-gmp php8.2-memcache php8.2-pgsql
  2. MySQL

    1
    apt install mariadb-server mariadb-client
  3. Apache2或者Nginx

    1
    2
    apt install apache2
    apt install nginx
  4. Invoice Ninja

    访问 Github Release 下载最新的版本,上传到服务器。

  5. Composer

    1
    apt install composer

2. 配置

2.1 创建数据库

1
2
mysql -u root -p
Enter Password: ******
1
2
3
4
5
MariaDB .. > create database ninjadb;
MariaDB .. > create user 'ninja'@'localhost' identified by 'ninjapass';
MariaDB .. > grant all privileges on ninjadb.* to 'ninja'@'localhost';
MariaDB .. > flush privileges;
MariaDB .. > exit

2.2 配置服务器

Nginx配置

官方给的配置如下,根据自己的环境进行修改:

1
2
3
4
5
6
7
8
9
10
11
12
13
14
15
16
17
18
19
20
21
22
23
24
25
26
27
28
29
30
31
32
33
34
35
36
37
38
39
40
41
42
43
44
45
46
47
48
49
50
51
52
53
54
55
56
57
58
59
60
61
62
63
64
65
66
67
68
69
70
71
72
73
74
75
76
77
78
79
80
81
82
83
84
85
86
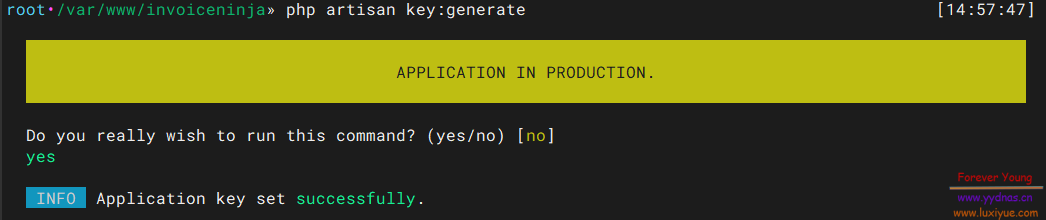
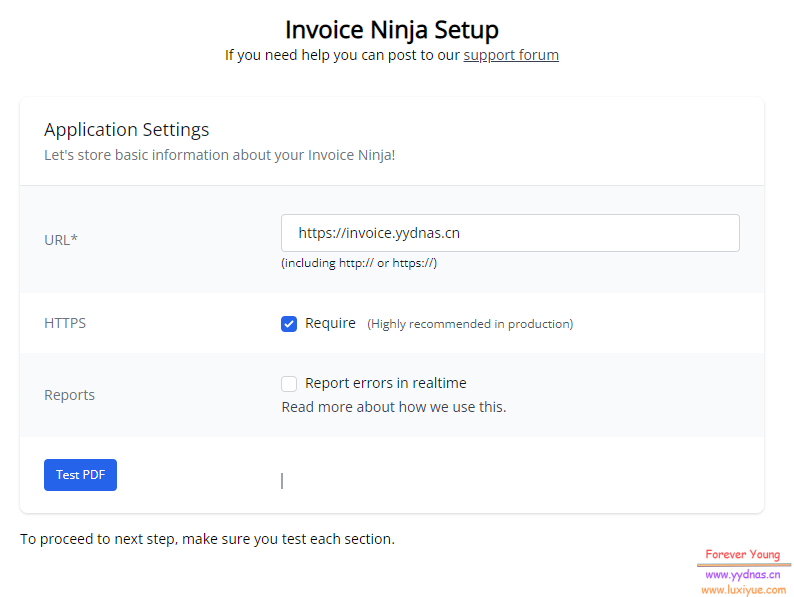
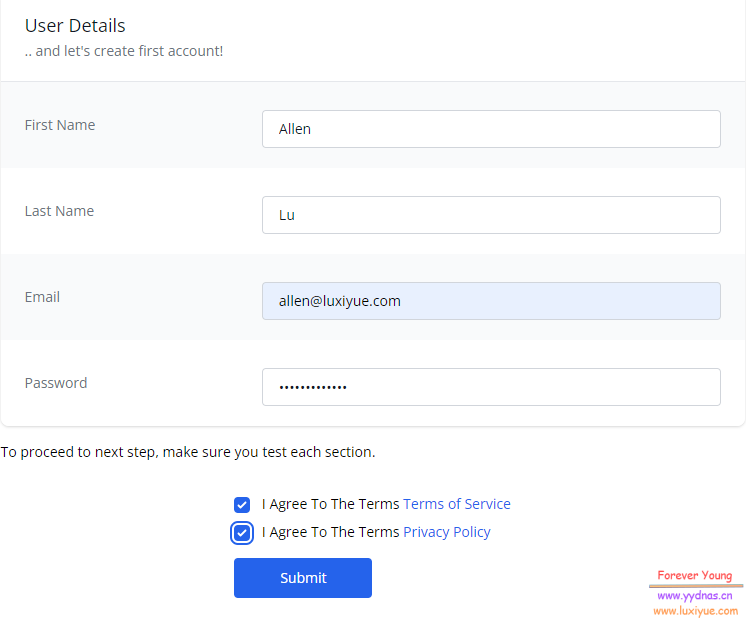
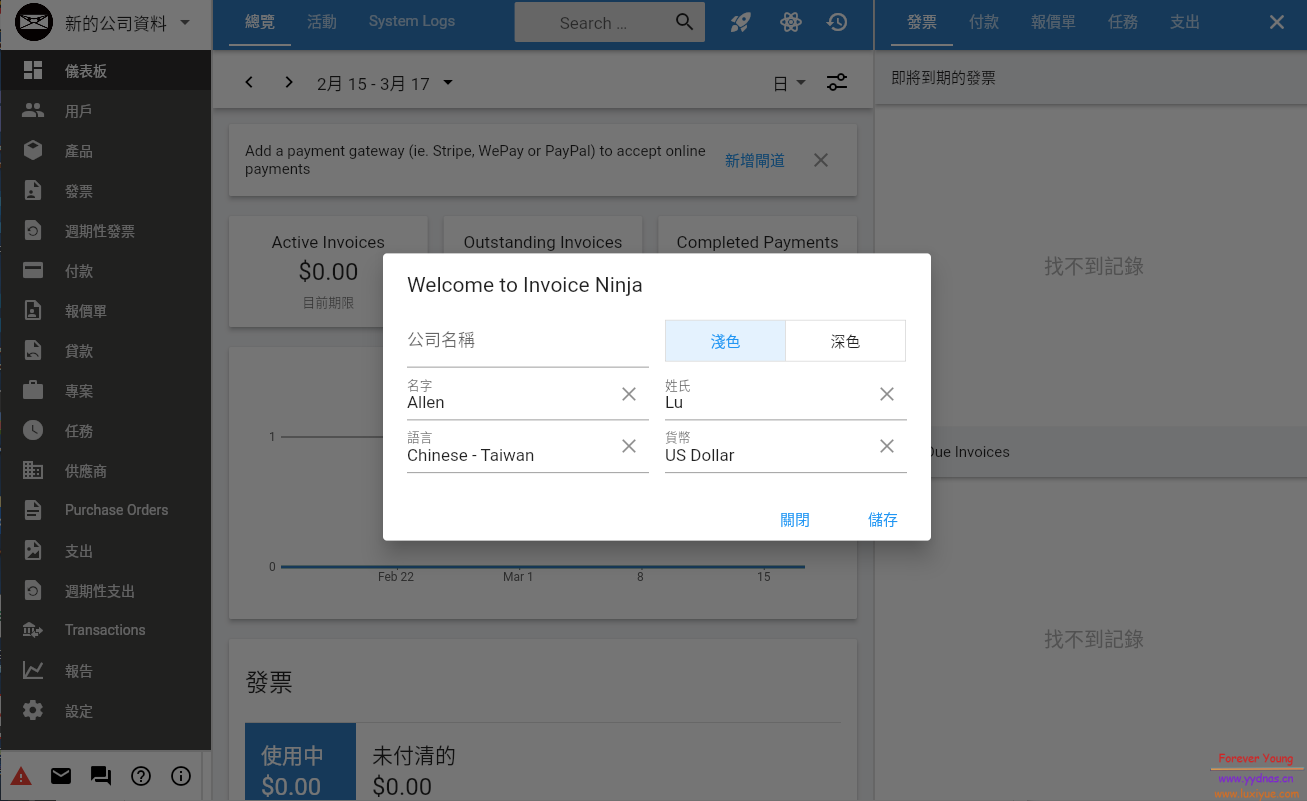
server {
# NOTE That the 'default_server' option is only necessary if this is your primary domain application.
# If you run multiple subdomains from the same host already, remove the 'default_server' option.
listen 443 ssl http2 default_server;
listen [::]:443 ssl http2 default_server;
server_name """invoices.example.ca""";
client_max_body_size 20M;

# This if statement will forcefully redirect any connection attempts to explicitly use the domain name.
# If not, and your DNS doesn't provide IP address protection, accessing the server with direct IP can
# cause glitches with the services provided by the app, that could be security, or usability issues.

if ($host != $server_name) {
return 301 https://$server_name$request_uri;
}

# Here, enter the path to your invoiceninja directory, in the public dir. VERY IMPORTANT
# DO NOT point the root directly at your invoiceninja directory, it MUST point at the public folder
# This is for security reasons.
root /usr/share/nginx/"""invoiceninja"""/public;

gzip on;
gzip_types application/javascript application/x-javascript text/javascript text/plain application/xml application/json;
gzip_proxied no-cache no-store private expired auth;
gzip_min_length 1000;

index index.php index.html index.htm;

# Enter the path to your existing ssl certificate file, and certificate private key file
# If you don’t have one yet, you can configure one with openssl in the next step.
ssl_certificate "/etc/nginx/cert/ninja.crt";
ssl_certificate_key "/etc/nginx/cert/ninja.key";

ssl_session_cache shared:SSL:1m;
ssl_session_timeout 10m;
ssl_ciphers 'AES128+EECDH:AES128+EDH:!aNULL';
ssl_prefer_server_ciphers on;
ssl_protocols TLSv1 TLSv1.1 TLSv1.2;

charset utf-8;

# Load configuration files for the default server block.
include /etc/nginx/default.d/*.conf;

location / {
try_files $uri $uri/ /index.php?$query_string;
}

if (!-e $request_filename) {
rewrite ^(.+)$ /index.php?q= last;
}

location ~ \.php$ {
fastcgi_split_path_info ^(.+\.php)(/.+)$;
# Here we pass php requests to the php7.4-fpm listen socket.
# PHP errors are often because this value is not correct.
# Verify your php7.4-fpm.sock socket file exists at the below directory
# and that the php7.4-fpm service is running.
fastcgi_pass unix:/run/php/php7.4-fpm.sock;
fastcgi_index index.php;
include fastcgi_params;
fastcgi_param SCRIPT_FILENAME $document_root$fastcgi_script_name;
fastcgi_intercept_errors off;
fastcgi_buffer_size 16k;
fastcgi_buffers 4 16k;
}

location ~ /\.ht {
deny all;
}

location = /favicon.ico { access_log off; log_not_found off; }
location = /robots.txt { access_log off; log_not_found off; }

access_log /var/log/nginx/ininja.access.log;
error_log /var/log/nginx/ininja.error.log;

sendfile off;
}

server {
listen 80;
server_name """invoices.example.ca""";
add_header Strict-Transport-Security max-age=2592000;
rewrite ^ https://$server_name$request_uri? permanent;
}

这边官方没有给出Apache2的配置,一般来说,应该只要将目录指向 public 即可。(未做测试)

2.3 配置环境

copy 程序目录下的 .env.example.env 并编辑:

1
2
cp .env.example .env
vim .env

修改以下几项:

1
2
3
4
5
DB_HOST=localhost
DB_DATABASE=ninja
DB_USERNAME=ninja
DB_PASSWORD=ninja
DB_PORT=3306

额外的邮箱服务器也可配置:

1
2
3
4
5
6
7
8
MAIL_MAILER=smtp
MAIL_HOST=smtp.mailtrap.io
MAIL_PORT=2525
MAIL_USERNAME=null
MAIL_PASSWORD=null
MAIL_ENCRYPTION=null
MAIL_FROM_ADDRESS='user@example.com'
MAIL_FROM_NAME='Self Hosted User'

更多配置说明请查看官方的 Environment Variables

2.4 创建秘钥

1
php artisan key:generate

2.5 设置权限

1
chown -R www-data:www-data /usr/share/nginx/invoiceninja

2.6 载入配置

1
php artisan optimize

2.7 cron任务

1
sudo -u www-data crontab -e

将下面这条添加到内容,修改其中的地址:

1
* * * * * php /usr/share/nginx/"""invoiceninja"""/artisan schedule:run >> /dev/null 2>&1

访问

打开浏览器,根据提示一步一步完成即可。

  1. 设置网站

  2. 数据库连接

  3. 邮件设置(可以跳过)

  4. 登录账号

  5. 登录后台

这边不得不提一下,好像没有简体中文,只有繁体的。。

  1. 最后我想体验一下的,然后点了几个功能之后,网站就直接白屏了,不显示任何内容:

最后

虽然这次体验算是一个半成品,就我最后看下来的几个内容,不管是个人还是公司,都非常适合使用。

但是就它不支持简体中文这点,我就不准备使用了。