Matomo Analytics 页面流量统计与分析安装配置
概要
流量统计其实对个人站点来说可有可无,尤其是像我这种纯粹自己使用的。
只是在看文章的时候正好浏览到,想着试试看怎么样,于是就差点“逝世”了。。
摘自别人分析统计的各平台方案:
| 解决方案/平台 | 优势 | 劣势 |
|---|---|---|
| Google Analytics | 部署简单,只需在页面加入 JS 追踪器代码,数据分析快(小时级别),功能强大,分析维度丰富 | 数据量大的时候偶尔会丢失数据,无法定制化 |
| Adobe Analytics | 数据展示清晰明了,功能强大 | 部署复杂,只有付费版本,技术支持和文档都较少 |
| WebTrends | 数据分析维度丰富,报告全面,监控过程安全 | 主要针对大客户,费用非常高 |
| CNZZ | 部署和接入简单,分析功能易用,报告简洁 | 没有用户细分数据,也不支持用户路径分析,功能较为单一 |
| Matomo | 对标 Google Analytics 的功能,接入简单,功能强大,分析维度丰富,支持私有化部署,包括代码和数据都可以私有化处理,有强大的插件机制,可以自行开发功能 | 私有化需要自行部署和维护服务器、数据库等,部分分析功能需要二次开发 |
实践环节
第一部分
照例给出官方网站,很多东西官网都有文档可以查阅。
TIPS:如果服务器只对外布置了Wordpress,那么直接在WP中搜索插件就行,安装后会得到一串代码,可以直接跳到本文最后部分。
第二部分
1. 配置环节
环境:Nginx + PHP-FPM
其实,官方没有给出很明确的配置,它是放在某个很隐蔽的角落,写这篇文章的时候差点没找到。
服务器配置就直接跳过了,官方给的Matomo的配置文件有点绕,我直接精简了一下,有些地方自行更改即可。
1 | server { |
配置好放置在 etc/nginx/sites-enable/matomo.conf 即可。
1 | nginx -t #检查配置 |
2. 安装环节
输入域名访问,下面是官方文档,自行阅读翻译。
2.1 The Welcome Screen
Time to get started with the point-and-click installation! Click Next »
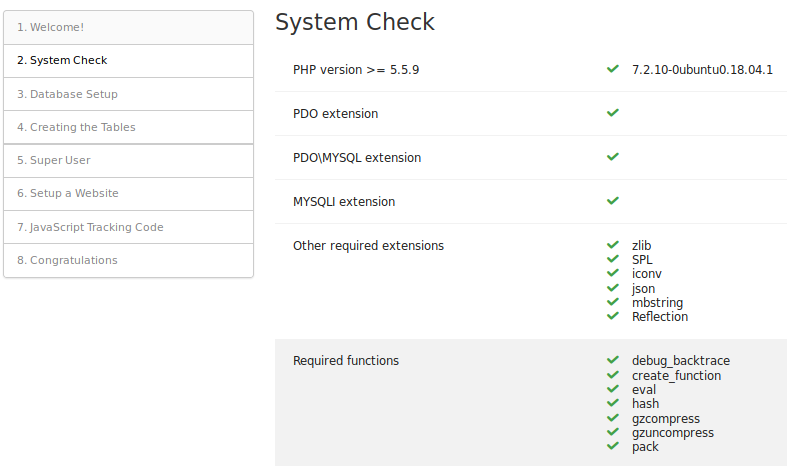
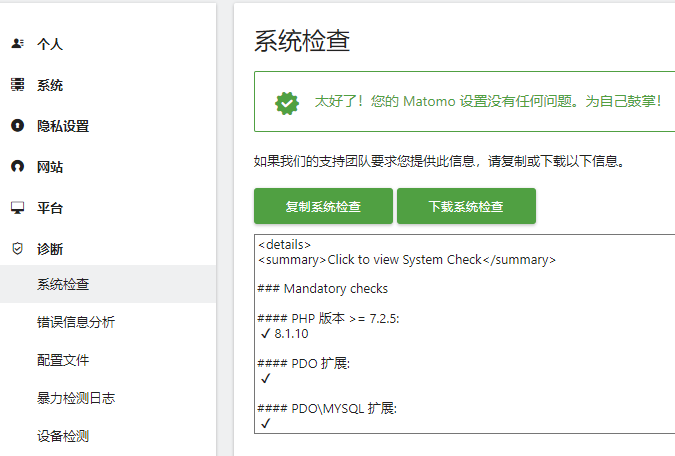
2.2 System Check
Matomo will check to make sure that your server meets the Matomo requirements. If everything is okay, you’ll see a long list like this:
If there is a problem, Matomo will identify it and tell you how to solve it, as in this example:
When all the requirements are met, click Next »
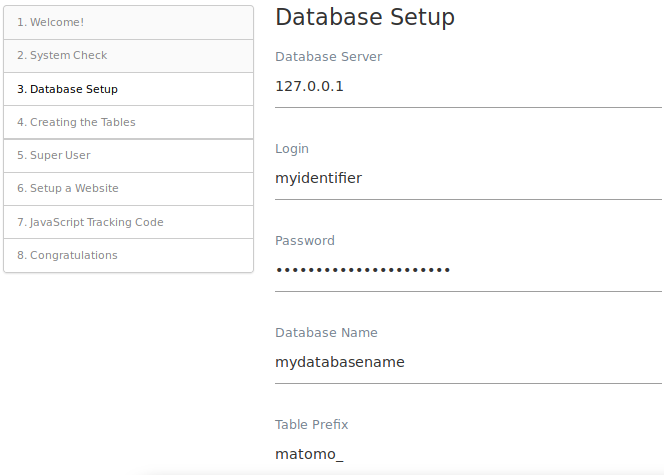
2.3 MySQL Database Setup
You should already have set up your MySQL database. If you do not have the database information, you may need to ask your web host or technical staff.
Security note: for added security, we recommend that you install Matomo in its own MySQL database and specify a username and password for a user that only has access to that database. Click here to see detailed instructions on how to create a new database and MySQL user.
(Note that by default the port 3306 is used when connecting to the database. If your server uses a different port you can enter it after the hostname, for example localhost:3307)
Once you have filled in the form, click Next »
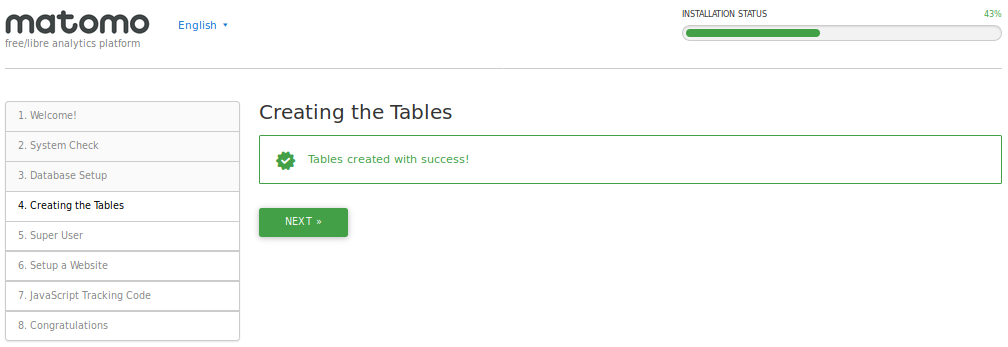
Matomo will add the necessary tables to your database:
Click Next »
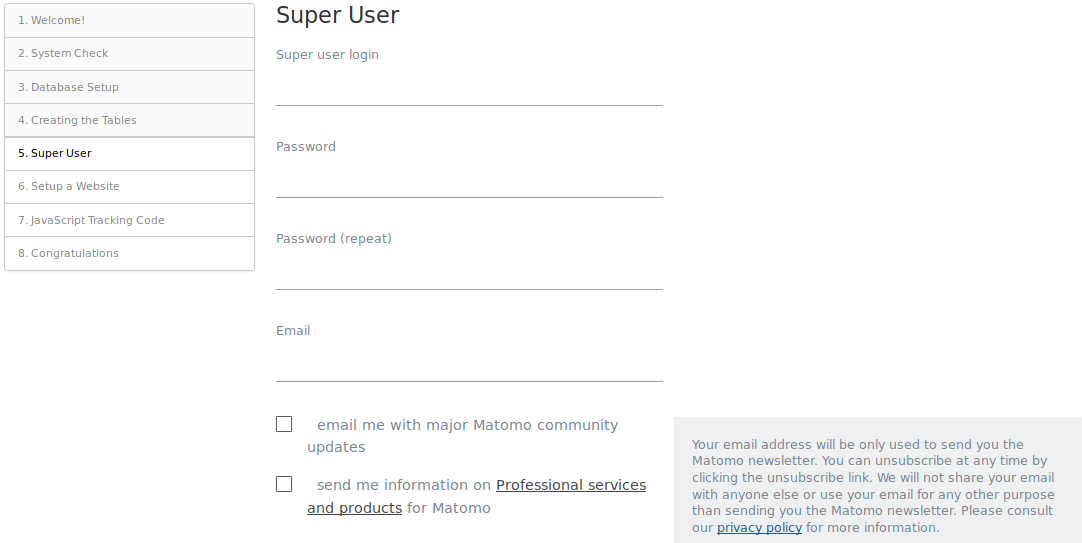
2.4 Super User
The super user is the user that you create when you install Matomo. This user has the highest permissions. Choose your username and password:
Do not lose this information; it is the only way for you to log in to Matomo for the first time. There is only one super user in each Matomo installation. The super user can perform administrative tasks such as adding new websites to monitor, adding users, changing user permissions, and enabling and disabling plugins.
By default the super user will be signed up for upgrade and security alerts, as well as for community updates. Uncheck these boxes if you do not want to receive these emails.
Fill in the information and click Next »
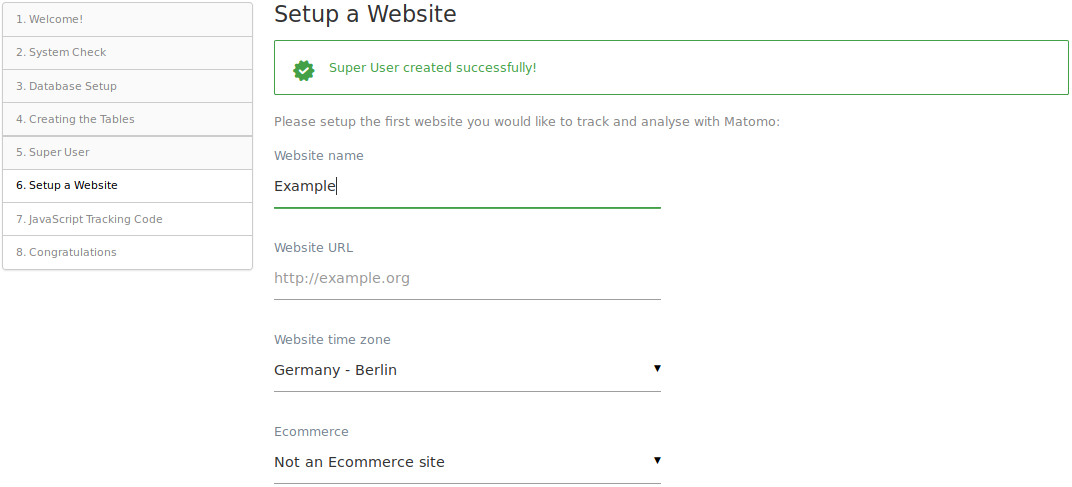
2.5 Set up Your First Website
Enter the name and URL of the first website you want to track. You can add more websites once the installation is complete.
Click Next »
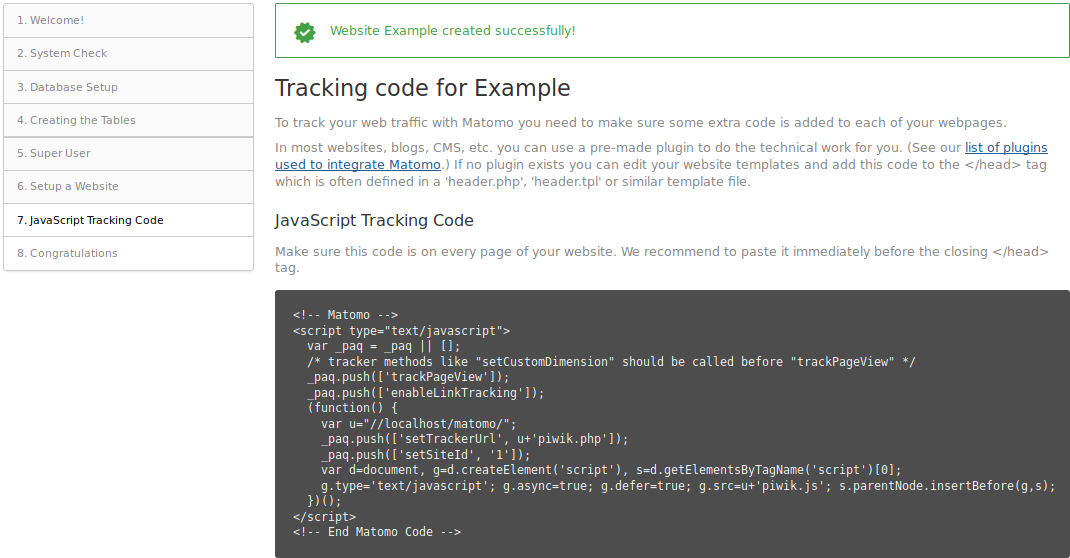
2.6 Install the JavaScript Tracking Tag
Matomo will issue you with a JavaScript tag. This code must appear on every page that you want Matomo to analyze. We recommend that you paste this code immediately before your closing tag (or in a general header file that is included at the top of all your pages).
Step-by-step guides are available for the most popular CMS such as: WordPress, Joomla, Webflow, Shopify store, SquareSpace, Wix, GoDaddy Website Builder, Drupal, Jimdo. Matomo can also be integrated in Android and iOS apps, in GTM (Google Tag Manager), Ionic mobile apps and more.
Otherwise you will need to insert your tracking tag manually.
When you have copied your tracking tag click Next »
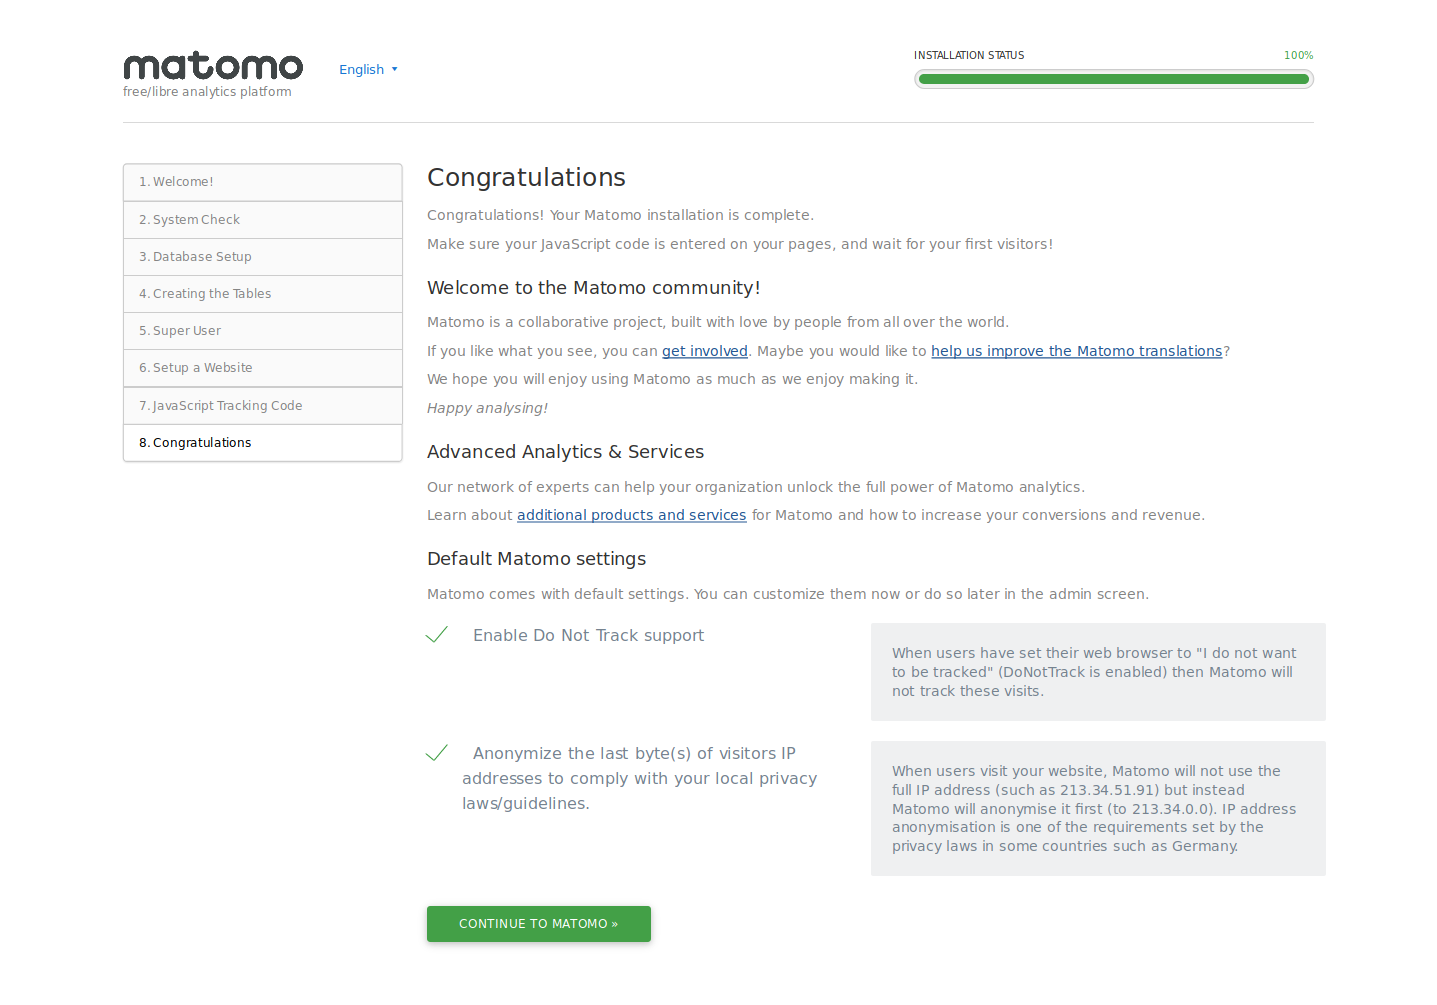
2.7 Congratulations!
Matomo is installed and ready to track your visitors. As soon as visitors start arriving, Matomo will be keeping track of their data. Matomo reports are generated in real time, so you should see data in your Matomo dashboard straight away.
Click Continue to Matomo » and log in to your dashboard!
If something isn’t working correctly or you are experiencing an error, you may want to take a look at the Troubleshooting Guide.


3. 插入代码
得到下面这串代码:
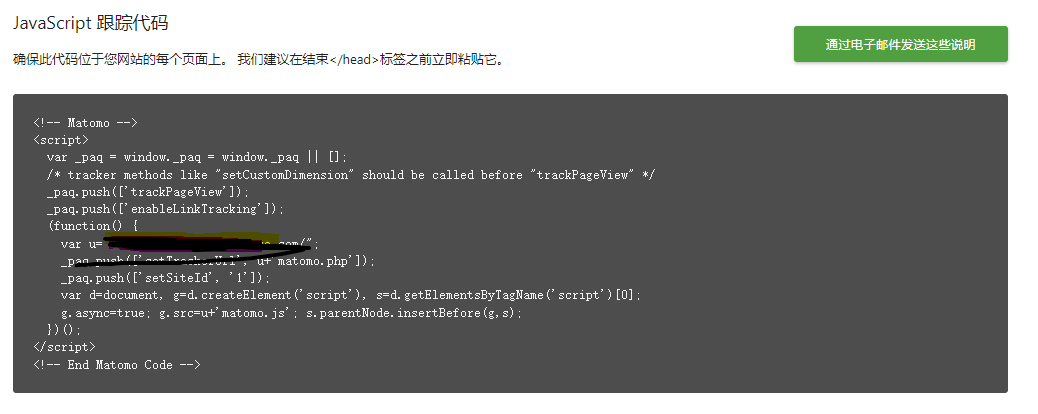
在你的网页, header 或者 footer 的 </body> 前加入即可。
第三部分
在安装完后,后台右上角-设置按钮-诊断-系统检查,看下有什么地方要改的。
总结
其实写这篇文章,一方面是好玩,另一方面就是记录一下配置文件,稍微有一点配置不对的,它这个检查就提示一堆警告。
经历了一个下午,终于把这个完善了。
继续寻找下一个课题。